Friday, August 12, 2011

The best fun you can have is giving!

I am preparing to attend a charity event on Saturday. It's called Diva for a Day and it is for foster pre-teen and teen girls with their new foster moms.It is being put on by: http://www.wynspring.org/  They will be getting a nice lunch,  their hair primped, a Make-up makeover and of course, I will be polishing their nails. I received a very nice donation of 15 Files and 15 Full size Nicole polishes from ABS Beauty Supply in Roseville, CA http://www.absbeauty.com/index.html . I also received 15 lip Balms from Henry whom, is my Avon Rep. Here in Citrus heights, CA http://www.youravon.com/henrybrooks.  I don't want to leave out my girlfriend Amanda, whom works at the Zoo was able to get each of the girls a pass to the Zoo! Plus they will be getting allot of other goodies from others that are donating for this good cause.

I made these cute little gift bags for their goodies.


So I thought maybe some of you would like to try this, it is not hard.
Here I have (2) Shapes from Scrapbook paper. I used my electronic cutter to cut the (topnote like shape)
I also have a plain white paper lunch bag cut to just a bit under the size of the paper shape.

Next I used my double sided glue runner tape and ran the tape around all 4 edges of the bag. I adhered the paper shape to the bag on both sides.

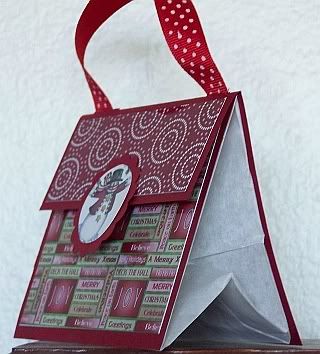
Here is a side shot so you can understand how this goes together.

Another Shot- more of the front side

This is the stack of little bags waiting for decoration!

Next I add decoration to the front of the bags and punch a hole in the center top to make a handle.
This can get tricky. I used a round 1" punch on one side, lined up the other side with the 1st punch and punched again. I did do the 1st 2 bags through all the layers, but would not recommend it because it may break your punch.

This is the final result all bags have the goodies in them and are now packed up and ready to go to tomorrow's event!
I hope this will inspire you to give of your talents! You never know who will be blessed by it!

Thursday, August 4, 2011

Newest Nail Design - Monster vs. Konad

I have been very intrigued with a new form of nail design. It's very simple , but it does take practice to get it just right. It's Nail Stamping. I had purchased a Konad stamping plate about 4 months ago, played with it a little and put it away. I then bought the Monster Bundle Plates from Amazon.com. I really like the designs, but I must say that the Konad Plates are superior to the MB Plates. The MB plates are not as deeply etched, so that is probabley the reason that they don't imprint that well. The Konad plates are alot more deeply etched and come out great! (oh and alot more expensive per plate) I decided that we just needed to play with the new plates, so I did a basic fill on my friend Rhonda. (Note: This is her first fill with me, she is letting her previous acrylic grow out and I am doing gel on her now)
Doesn't she have pretty hands? I think her nails and her cool zebra desgn came out great! I used a nailart striper black polish by Art Deco (I think I got it at the Dollar Tree) for the design. The other black polish I had wasn't working very well and it needs to be kind of thick. They sell speicial (expensive) polish for the stamping, but you can just play with and trying different polishes, until you find one that works. I have ALOT of polish, so that isn't very hard to do.


Her top hand pinkie is stamped with the MB16 Plate (Monster Bundle) as you can see it is not that dark, but I did the rest of her nails with M57 (Konad Plate) and we really liked it! I used the same polish on both plates and the Konad plate did much better. Since I have the new Monster Bundle plates I will have to figure out which polish works well with these new plates. I will be posting more as I figure this out. This is my new nail addiction!

Headband Sewing Project

I enjoy sewing and Ilove to get creative, this week my stepson asked if I would make his girl a Headband. He picked out all the colors and fabric and we came up with the design together.
I used this varigated purple mottled fabric and really pretty brown and purple paisley fabric and I did a very nice decorative stich # 17 on my Babylock  and it looks pretty darn cool! I'm now working on sewing a coupon holder. I will post that when I'm done!


Close up

Thursday, July 21, 2011

Jamming Away

Well this has been one very interesting week, which I thought should end with a relaxing day making some jam. After all I have made Jam with my mother in-law, a culinary queen! So I think I got this down. Um nooo, so I decided to enlist the help of a girlfriend of mine that has never made jam before and we can embark on a simple freezer jam together. Yea that sounds perfect! Well I start off buying a clamshell full of strawberries, not sure how much exactly comes in that, except I know we picked out the nicest ones and we got 4 cups worth. I then buy the pectin, expecting to have to cook it.( I found it at Walmart of all places, in the utinsel section) I bought No-Cook Freezer Jam Pectin by Ball. Wow! Even easier right? Well kind of...If the container would just say how many tablespoons of pectin to 4 cups of Strawberries. Let me go back a moment.
After we hulled the strawberries we spent an hour trying to figure out how much pectin we need to use. Mind you this is a VERY easy Freezer Jam to make, IF you just know what to mix and how much. Finally we looked it up on the Ball website.http://www.freshpreserving.com/home.aspx and they have a calculator! to tell you how much pectin to use. Well why didn't we think about this before?
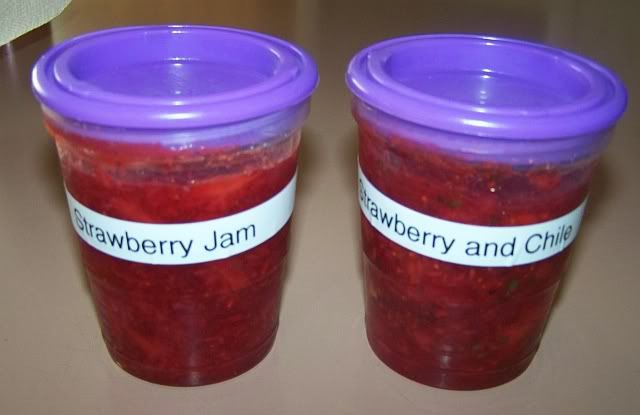
First we made sure to wash and sterilize our "jars" we bought the plastic jars with the purple tops made by Ball, We boiled some water and turned off the heat and dropped our jars and lids in. Waited for them to cool abit and dried them, not sure if we had to do this for this type of jam, but wanted to be safe. Then we mashed up our strawberries and we mixed up our pectin and sugar and poured it on the strawberries, let it sit for 30 min. until it was set and we put it in the fridge/Freezer! All Done.

So specifically here is the recipe:
  • Package of Ball Jars or Ziploc containers for the Freezer ( must close tightly)
Glad Freezer Containers
  • 4 Cups of Strawberries
  • 5 Tbsp Ball® RealFruit™ Instant Pectin
  • 1 2/3 cup Granulated Sugar
*Note on jars: We had 5- 8oz Plastic Ball Jars and I bought a package of Ziplock Plastic 4oz. containers
We actually got (3) 8oz and (1) 4oz container worth of jam with our 4 cups of Strawberries.
I also added finely diced Jalepenos to one of my 8oz jars per my husbands request.


1) Wash, hull and mash your strawberries- Set aside ( I also added 2 tablespoon of sugar to them to let them release their juice)
2) In a Large bowl Mix the sugar and pectin til well blended.
3) Add the strawberries to the sugar pectin mixture and mix for 3 minutes.
4) Fill jars - leave 1/2 in. head space at the top for the freezer expansion
5) Let sit for 30 minutes for the jam to set.
6) Enjoy! Immediately and store in fridge or save in Freezer.

They will last 3 weeks in your fridge or 1 year in the freezer.

Our Jam


Instant Pectin (No Cook Freezer Jam)

Sunday, July 3, 2011

Happy 4th of July

Well summer is in full swing and BBQ weekends are the standard. We just spent a great day with our best friends enjoying the summer and a refreshing pool swim! This weekend our friends smoked the most amazing ribs! The burgers and potato salad were just as yummy! Potato Salad recipe to come soon!
I made a Sugar Cookie Fruit Tart dessert: Recipe and directions below.


Sugar Cookie Fruit Tart


Recipe:
1 Roll of Sugar cookie dough
1/4 cup Berry jelly- Warm slightly
2 tablespoons of Butter
2 cups of Blueberries
1 cup Powdered Sugar
2 cups of Strawberries sliced in half
1 Whipped Cream Can or Tub( optional ) for topping.

Take the chilled cookie dough and use a little powderd sugar on your work surface to form it into a ball and press into tart pan, or as you see I didn't have that pan; I improvised and used a shallow baking dish.
With the palm of your hand press the dough flat and make a small lip around all four sides of the dish, if your using the shallow baking dish.


With a basting brush take the warmed jelly, mine was raspberry that I made with my mother in law earlier this year. Baste the cookie tart with a thin layer of the jelly. Add Pastry Cream and spread evenly. Go to the recipe here: Pastry Cream.

Add fruit: I used Strawberries and Blueberries.
Moisten about a cup of the Blueberries and toss in the powdered sugar.
Use this for stars and the white stripes for the flag on your tart.

Baste the fruit with the jelly to keep it from drying out and it will look glossy and oh so yummy!


Yuminess!
Have a happy and safe 4th of July!

Saturday, June 11, 2011

Tomatillo Chipotle Salsa

I was reading the May 2011 issue of Martha Stewart and came across a yummy salsa recipe this week, so I decided that today would be a good day to try it. It's super easy to make.


The Recipe:
6 Tomatillos, husked, wasked and quartered
3 Garlic Cloves (unpeeled)
Canned Chipotle Chiles in Adobo Sauce.
1/4 tspn sugar * I used it , but wouldn't next time.
Coarse Salt * I used regular salt.
*I also added a pinch of Cumin ( Not in the orginal recipe), but added a very yummy flavor!

Directions:
1.) Cook Tomatillos and garlic on a cast iron skillet, until cahrred all over. Over Med-High Heat. Transfer to plate to cool.


2) Peel garlic and finely chop Tomatillos and Garlic and mix together, along with the Chipotle Chiles.( I put them in my Mini food Processer and chopped them all together.
3) Add Salt and sugar, but I would omit the sugar and add a dash of cumin.
4) Put in a jar or container with a tight lid and let cool. Refridgerate up to a week.


Ok a word about the Chipotle Chiles in adobo sauce. These Chipotles can be Hot and although Martha says to add 4 of these chiles, That would be way to hot! REALLY Martha? I bet you can even take this kind of heat.
So I say start with 2 and blend it all together, taste before adding any more. I added 3 and it is about as Hot as I can enjoy it, of course my Mikey loves this amount of heat. I would say 3 would be considered Med hot. and 2 considered spicy, but more like just medium. I just froze the rest of the canned chipotle chiles for another sauce later.
 
 
We will enjoy this on our tacos for dinner tonight!


Wednesday, February 16, 2011

Birthday Quilt

Well this last weekend my grandaughter had her 10th birthday and this is what I made for her. A Pincess Quilt. She just loved it and I am so happy I was able to make it for her. She had an Alice in Wonderland Birthday party and I added some pictures here. It was so cute and fun for her!


The Back


The Party


Yummy Food Too!


Thursday, January 20, 2011

Heart Pot Holder

Well since Valentines Day is next month, I have decided to share a heart shaped pot holder I made. I made this last year and gave a few of them away. I made one for my husband with a cool fire background. I got the original Idea from Martha Stewart living Magazine. Unfortunitly I tossed the magazine without getting the pattern. I snooped around her website and finally got the pattern.  Go here to get all the info plus the pattern. marthastewart.com

This is the one I made my Hubby
Here are a picture of the other one I made.


The key in making these is to buy the fire resistant material. You don't want to burn your fingers when using these on your pot or pans. I used regular cotton batting from warm and natural and I like the thickness.
It was not to thick, but yet they are functional. The only tough time I had was with the binding. I would love to buy a binding tool to do that work. Just take it slow when sewing and make sure you catching both sides with the needle.

Sunday, October 10, 2010

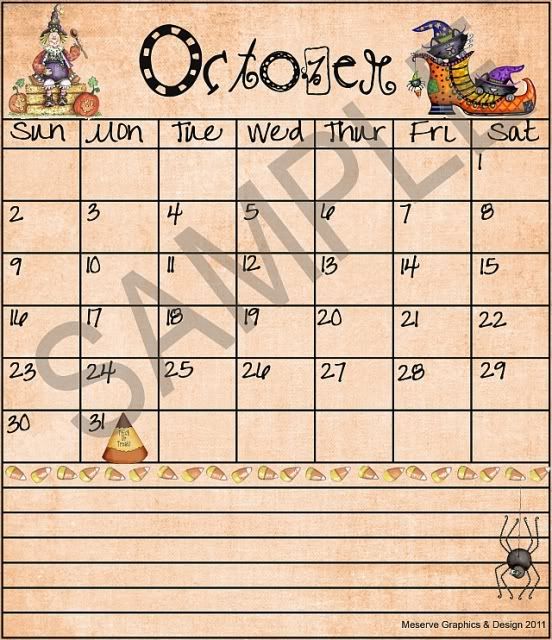
New Items- CD Jewel Case Calendars

I have been working hard the last couple of day's to bring you a new cool item for 2011.
This Cd Calendar comes with the Holder and 12 Calendar Months for only $10 plus Shipping.


OR


OR


Email for orders accepted through Paypal

Tuesday, July 13, 2010

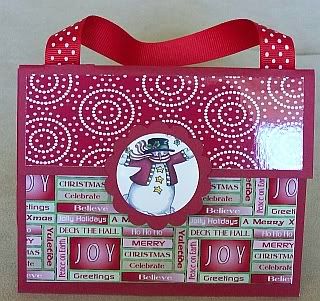
Cute Little Bags

I came across the cutest little bags from http://inkingidaho.blogspot.com/2009/07/paper-bag-purse.html and I thought wow those are really cute. So I decided to try some for my self and here is the one I made today.


Sunday, July 11, 2010

Christmas Cards

Well I decided I had better get started in setting up the sample of Christmas cards I am selling this year and taking orders. I will have 4 designs and the minimum order is 12. I have one more design that will be posted this coming week, so please check back.
You can order 12 of any set or 6+6. They will include white envelopes that will be plain or lined in red or green paper. The sets including envelopes are $25 plus shipping. I will ship priority and if you need confirmation just add $1.00. I will accept pay pal payments and money orders. I will also take checks, but your check must clear, before I ship out. So without further delay here are the sets.

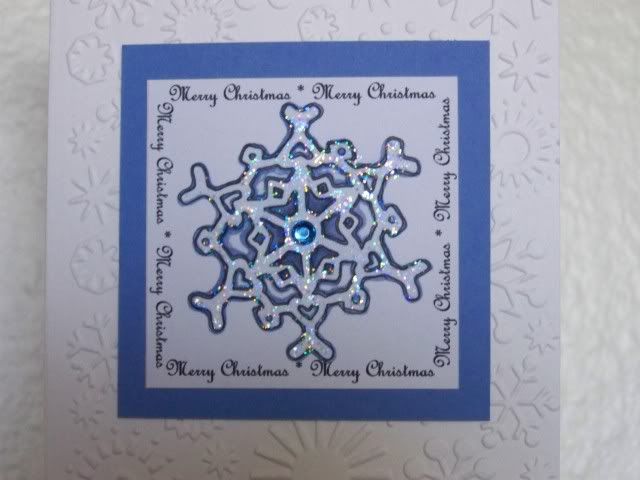
Snowflakes


The Snowflake Card is embossed and has a very pretty glittery finish on the snowflake. Plus a beautiful blue gem in the center.


Close Up


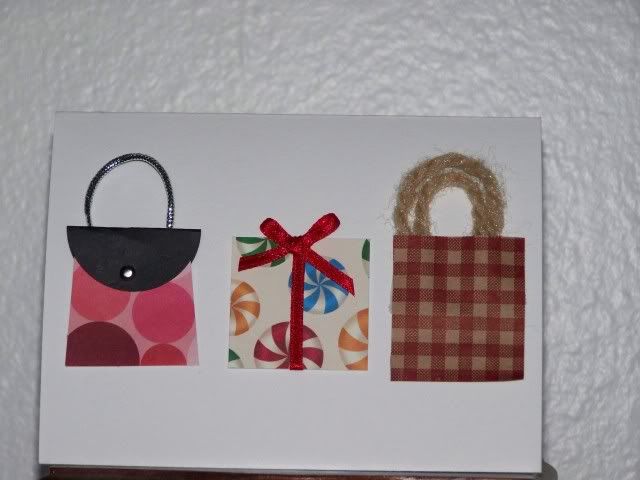
Shopping


This one will vary on type of paper used
However the design will be the same.

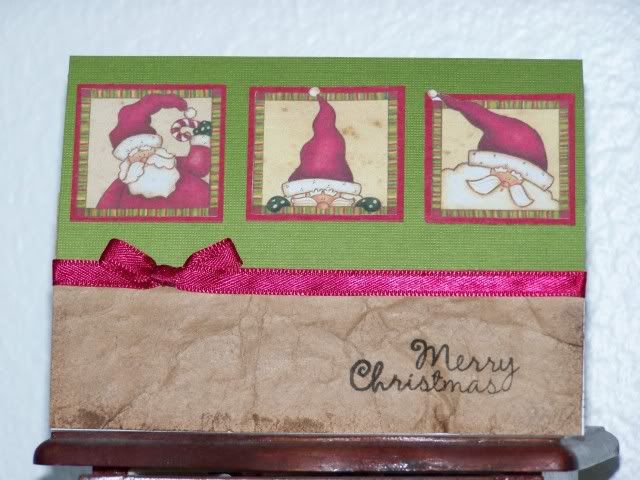
Santa


Without Flash


On this card I have distressed the edges for an older vintage look.